How to Paint on Copper | Preparing Copper Plate

By Candice Bohannon

Copper plate, if properly prepared, is a smooth, archival oil-painting surface that’s been used by artists for hundreds of years with stunning results. I purchase my copper plates from a printmaker’s supply company online. I usually use .050-inch (16 gauge) thickness, but a thinner plate is perfectly fine for painting on copper. Following is a demonstration on how to prepare copper plate for painting with oils.
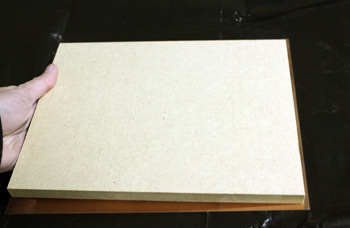
1. Cut Substrate for Copper Plate
To prepare copper plate as an archival surface, first cut a solid substrate to glue to the back of the copper plate. This will prevent bending, denting or any other major movement that would cause the painting to crack. Choose flat, medium-density fiberboard (MDF board) and cut it to just under the size of the copper plate.
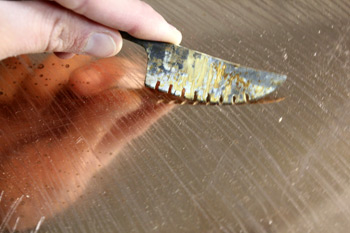
2. Roughen the Back of the Copper Plate
Sand the backside of the copper plate with coarse sandpaper or scratch grooves into the metal. This roughening will help the glue adhere to the surface. (Do not remove the protective plastic from the front of the copper plate.)

3. Remove Dust from the Copper Plate
To further ensure a good bond, clean off the sanded backside of the copper with denatured alcohol.
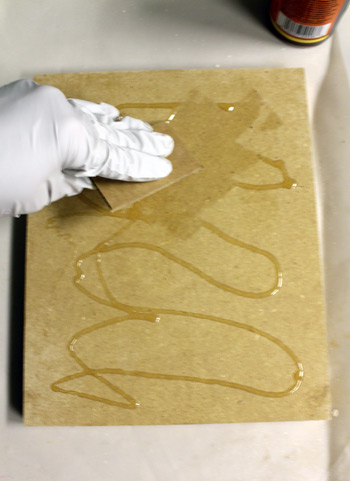
4. Glue the Copper Plate to the Substrate
Use strong polyurethane glue, such as Gorilla Glue or Titebond, to bind the copper plate to the MDF board, carefully following the instructions on the glue container. Note: Apply the glue to both the copper plate and the MDF board.

5. Tape the Copper Plate to the Substrate
To ensure a good bond between the surfaces I like to tape the board to the copper, …
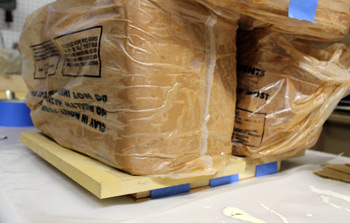
6. Apply Weight to Copper Plate and Substrate
… and then I apply weight to ensure that the backing does not slip to one side or the other while drying.
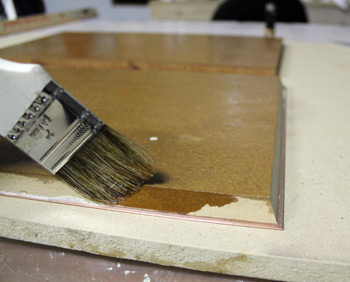
7. Seal the Substrate.
When the glue has set, seal the MDF with a wood sealer to prevent warping or other damage from water penetration.
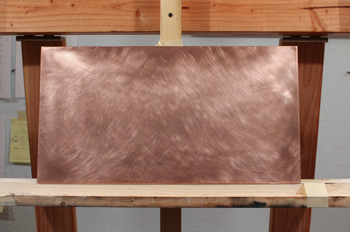
8. Sand and Clean the Front of the Copper Plate
Remove the plastic protection from the front of the copper plate and, while wearing a particle dust mask and nitrile gloves, sand the surface with fine-grit sandpaper, taking great care to sand the entire surface thoroughly. If you want a beveled edge on the copper plate, sand the edges of the plate with a file or a block wrapped in sand paper. Once the sanding is completed, clean the surface with denatured alcohol and a clean cotton rag or paper towels. Keep clean nitrile gloves on during this process to ensure that the oils of your skin do not come in contact with the copper plate.
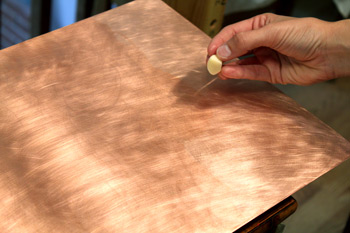
9. Etch the Copper Plate With Garlic Juice
Once the surface is clean, you may remove the particle dust mask and take the plate into the studio. Then cut a clove of garlic and rub it’s juice onto the painting surface or use a brush to apply a thin layer of pure garlic juice onto the surface. I usually have several garlic cloves and a razor blade on a plate nearby so, after covering a few square inches, I can slice or reslice a clove for fresh garlic juice. The garlic juice etches the surface of the copper and allows for a chemical bond to the lead in your primer and/or the lead in your white; this is in addition to the mechanical bond that sanding alone would provide.

10. Paint on the Prepared Copper Plate
The artist may paint on the freshly dried, garlic-juice-rubbed copper surface right away with pure oil paint or apply primer to create a silky smooth white surface for paint application. It is best to use lead white either when priming the surface of the copper or in the initial layers of the painting because the lead in the paint will chemically bond to the copper, further ensuring that the paint will have good adhesion to the surface. If you paint directly onto the copper plate, make sure that you cover all areas with paint, medium or varnish because exposed copper will eventually change color. Painting on copper is a different experience than painting on canvas or board. Plan on trying a variety of brushes of both natural and synthetic fibers in order to discover which ones work best for you.
How to Prime a Copper Plate
Priming is traditional when painting on copper plate. To do this, apply two coats of very thin lead-based oil primer to the surface. Keep these layers smooth and thin by rubbing on a small amount of the lead primer with the gloved palm of your hand. If you wish for a smoother surface, after the primer is dry, carefully wet sand the surface with oil and fine-grit sandpaper.
Candice Bohannon, a 2009 semifinalist in the Smithsonian National Portrait Gallery’s Ouwin Boochever Portrait Competition, was featured in the June 2012 issue of The Artist’s Magazine, available in both print and digital form.
Read More About Painting in Oil on Copper Panel
Kent Lovelace paints landscapes in transparent oils on copper surfaces that illuminate his glazed colors. See Kent Lovelace’s oil landscapes and a demonstration of how he paints on copper plate in the September 2011 issue of The Artist’s Magazine.


Is there a substitute for the garlic juice? Could I use lemon or another acid?
Hey Liz,
Not sure what you mean but it sounds possible. The only question would be how to adhere the two together and if that works and if it gives you enough support. I’d say to back it on a masonite board but that is just me.
Can you use a canvas board as a backing for a copper painting?